Guide: Installing Dzus Pro - S-Spring Receptacles
Install method: Dzus Pro with S-Spring Rivet-On Receptacle
1. Tools:

- Stepped Drill Bit – OR – 1/4" (6.5mm) Drill Bit
- 3/32” (2.5mm) Drill Bit
- 1/16” (1.5mm) Drill Bit
- Pop Rivet Tool
- Metal Scale – OR – Measuring Tape
- Marking Pen
2. Locate:

- Determine where to place Dzus Pro Bolt Hole.
- Tape the two sections of bodywork together.
Note: Taping the bodywork together will help set the gap between the two bodywork panels.
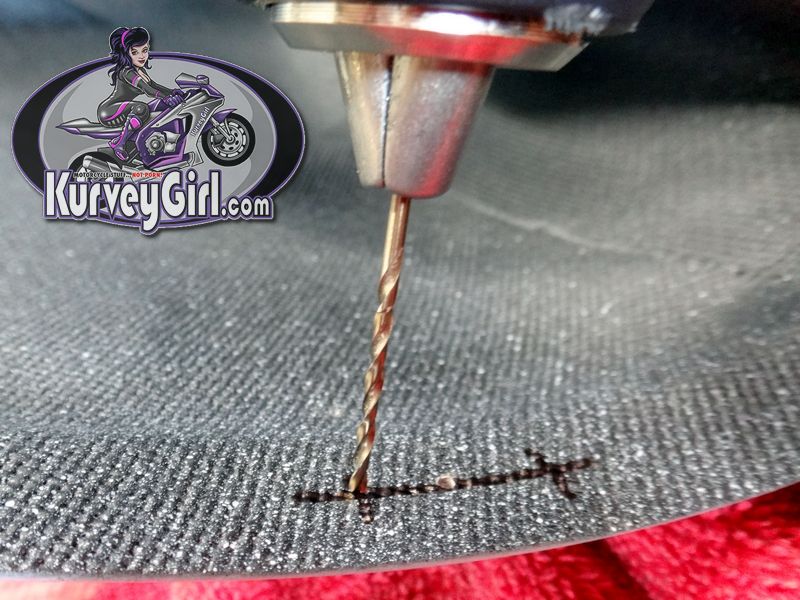
3. Pilot Hole Drill:

- Drill a Pilot Hole with a 1/16” (1.5mm) Drill Bit to locate the bolt hole for both sides.
- Repeat for additional holes joining the same panels.
4. Check Hole Location on Inner and Outer Pannels:

- Check the Pilot Hole has enough clearance to the top and bottom of each panel.
Note: If your Pilot Hole is not in a good position, repeat the Pilot Hole Drilling procedure. The 1/16” hole can be filled with epoxy before painting.
5. Mark S-Spring Receptacle Alignment Reference Line:

- S-Spring Receptacle is mounted on the Inside Panel.
- Using a straight edge (metal scale) and a Marking Pen, create a ~1inch (~30mm) Reference Line on the Inside Panel.
Note: This Reference Line will guide you on where to pre-drill the pop rivet holes.
6. Mark S-Spring Drilling Points:

- Make two marks 3/8” (9.5mm), on either side from the Pilot Hole.
7. Drill S-Spring Mounting Points:
- Use the 1/16” (1.5mm) Drill Bit to create initial pilot holes for the S-Springs.
8. Check S-Spring Mounting Holes:

- Check that all mounting holes align up.
- Check #1: Check Outer S-Spring Mounting holes are centered in the S-Spring
- Check #2: Check center bolt hole is aligned with the wire in the center.
Note: If your holes are not in the correct good position. The 1/16” (1.5mm) holes can be filled with epoxy.
9. Enlarge the rivet holes:

- Use the 3/32” (2.5mm) Drill bit to enlarge the rivet holes on each side.
10. Enlarge Pilot hole on Inner Panel for the Dzus Pro Bolt:

- Use the Stepped drill bit to enlarge the Pilot Hole to 1/4" (6.5mm).
Note: you can use a 1/4" (6.5mm) Drill bit, but a stepped drill bit makes a cleaner hole.
11. Mounting the S-Spring Receptacle:

- Install the S-Spring Receptacle with the included 3/32” Pop Rivets.
- Put one of the 3/32” Pop Rivets though the bodywork and S-Spring Receptacle mounted on the inside bodywork panel.
- Squeeze the Pop Rivet tool to fasten the rivet plate to the bodywork.
12. Check Pop Rivets Appearance after mounting S-Spring Receptacle:

- Pop Rivets should be deformed inside S-Spring Receptacle mounting eyes.
13. Pop Rivets Appearance after mounting S-Spring Receptacle:

- Pop Rivet heads should be flush to the bodywork
- Dzus Pro Bolt should fit and engage into S-Spring Receptacle.
14. Enlarge Pilot hole on Outer Panel for the Dzus Pro Bolt:

- Use the Stepped drill bit to enlarge the Pilot Hole to 1/4" (6.5mm).
Note: you can use a 1/4" (6.5mm) Drill bit, but a stepped drill bit makes a cleaner hole.
15. Install bolt:

- Install the bolt though the outer panel
- Use a plastic washer on the inside to hold the bolt to the outer bodywork.
16. Installed bolt:
