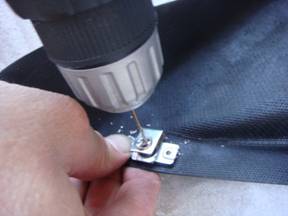
Guide: Installing Dzus Panex - Rivet Plates
Install method: Dzus Panex Rivet-On
1. Tools:

- Stepped Drill Bit – OR – ¼” Drill Bit
- 1/8” Drill Bit
- 1/16” Drill Bit
- Pop Rivet Tool
- Measuring Tape
2. Check

- Locate Rivet Plate on flat surface.
- Rivet plates offer more mounting options than clip-on plates.
3. Drill Pilot Holes for rivet plates:

- With clip located, use 1/16” drill bit to dill a pilot hole to accurately locate the two pop rivet holes.
4. Drill Pilot Holes for Dzus bolt hole:

- With clip located, use 1/16” drill bit to dill a pilot hole to accurately locate the Dzus bolt hole.
5. Use Backside center Dzus bolt hole to locate outer hole:

- Remove Clip
- Hold bodywork together
- Use the 1/16” Drill bit from backside and drill though front bodywork to locate the outer hole.
6. Enlarge the rivet holes:

- Use the stepped drill bit hole or a 1/8” Drill bit to enlarge the rivet holes on each side
7. Enlarge the Dzus bolt holes:

- Use a stepped drill bit to enlarge the hole for the bolt on the outer panel to ¼”.
- Use a stepped drill bit to enlarge the hole for the bolt on the inner panel to ½”. This is to let the rivet plate sit flush to the inner panel.
- Note: Can use a ¼” Drill bit in a pinch, but a stepped drill bit makes a cleaner hole
8. Mounting the Rivet Plate:

- Put a 1/8” Pop Rivet though the bodywork and rivet plate held on the inside.
- Squeeze the Pop Rivet tool to fasten the rivet plate to the bodywork.
9. Pop Rivets Appearance after mounting:

10. Install bolt:

- Install the bolt though the outer panel
- Use a plastic washer on both the inside and outside to hold the bolt to the outer bodywork. The inside washer will protect your paint from wear.
- Insert bolt though inner panel and turn bolt to engage.
- It is normal to be difficult to turn the bolt the first time.
- If the bolt seems “Loose”, you can add a second washer on the bolt to snug up the fit.
